A Study In Indirect Lighting
This project was created in my own DirectX 11 graphics engine, source code available on GitHub.
Contents:
Introduction
Indirect lighting first piqued my interest when I watched Alexander Sannikov’s talk from ExileCon 2023 about rendering Path of Exile 2. When I first saw the part about global illumination, I was filled with excitement, jumping up and down in my chair. I remember thinking, ‘That’s so cool!’ And as always when I feel that way about something, it was followed by, ‘I wanna do that!’
The thing I find most fascinating about lighting and indirect lighting, is how much it can convey emotion and tell stories just on its own. An simple scene can look amazing with the right lighting, and as a programmer who particularly enjoys the visual aspect of games, this was something I wanted to explore and learn more about.
I decided to research different kinds of global illumination. I read about voxel-based techniques, spherical harmonic lighting, reflective shadow maps and virtual point lights. The best looking ones also tended to be the most advanced, so ultimately I decided a good starting point on my indirect lighting-journey would be to implement a version based on reflective shadow maps. I found it to be a good fit for two reasons: the scope seemed reasonable, but more importantly it allows for dynamic lighting.
Reflective Shadow Maps
I based my implementation on this paper by Dachsbacher and Stamminger.
What is a reflective shadow map?
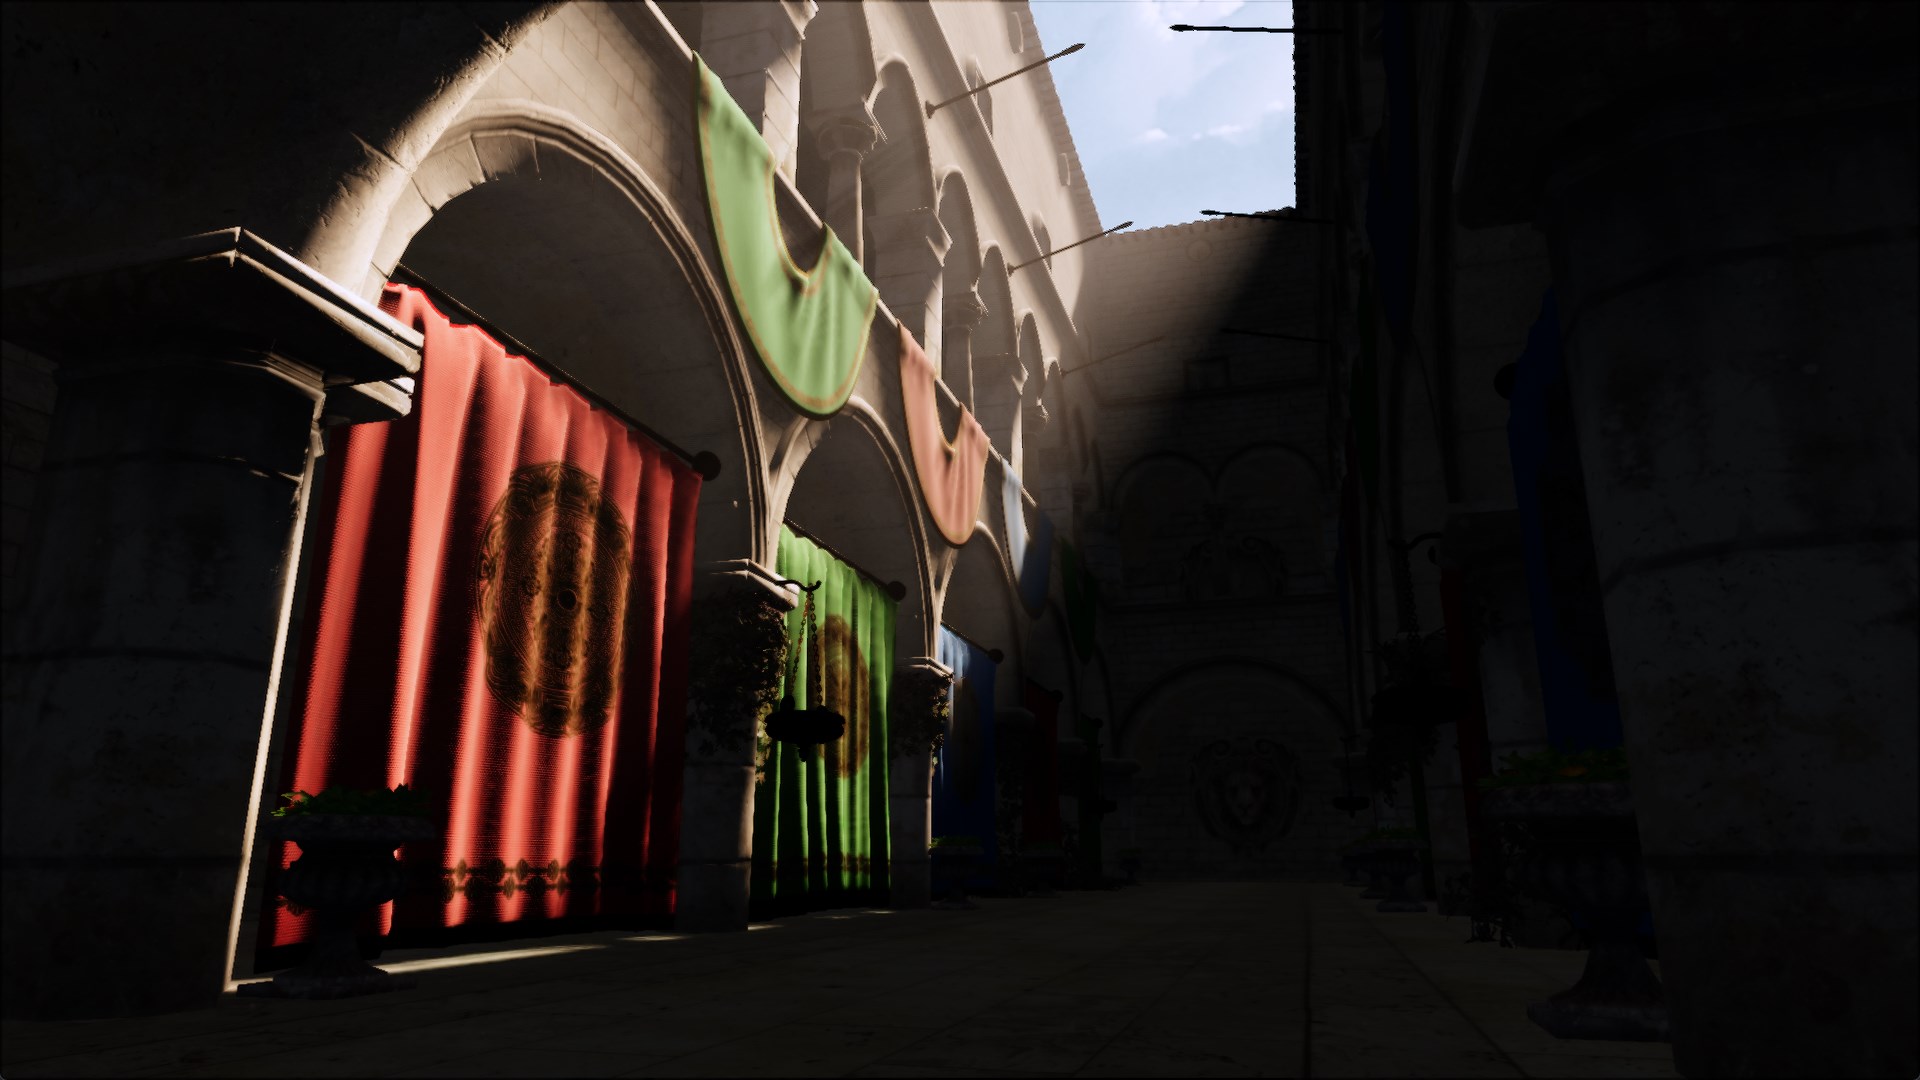
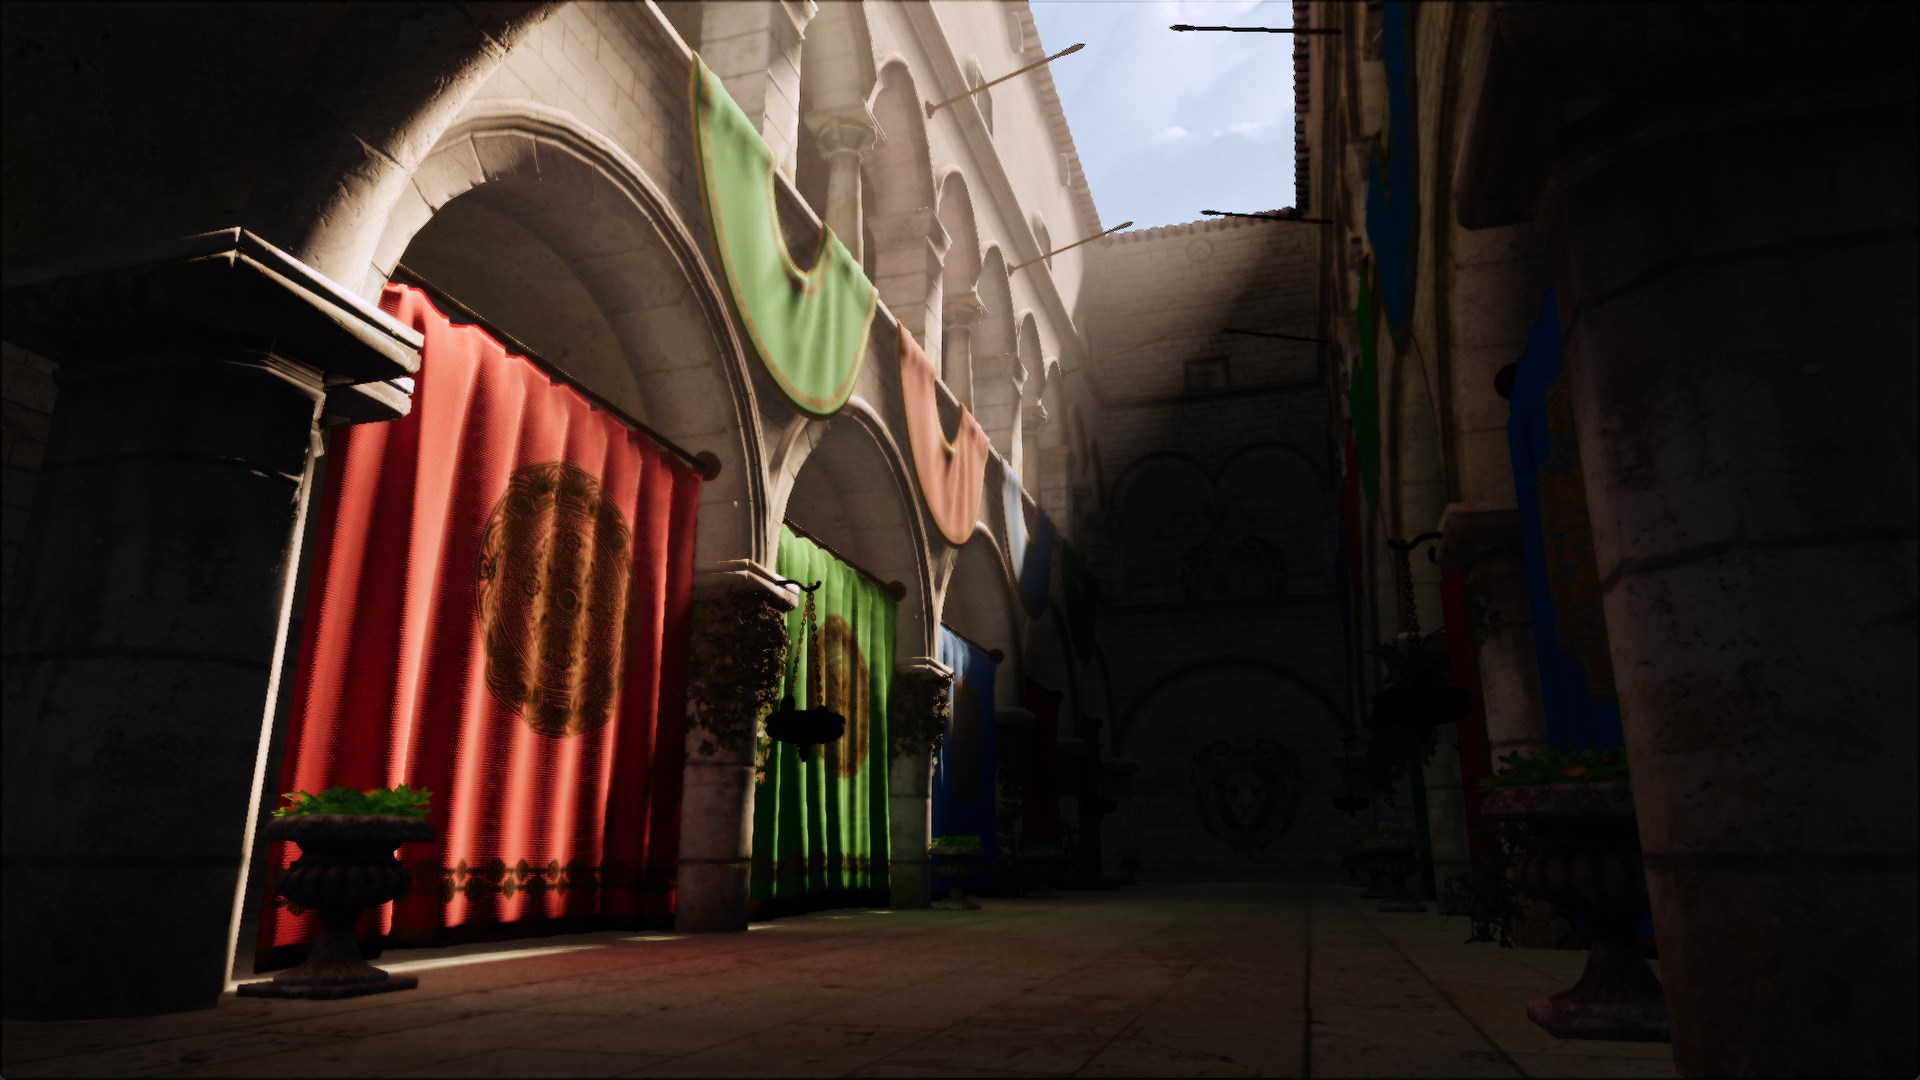
A reflective shadow map is an extension to a standard shadow map, where each pixel is considered as an indirect light source. Whereas a standard shadow map only utilises a depth buffer, a reflective shadow map expands on this with world space coordinates, normal and flux, where flux is the product of the pixel colour and the colour of the light source.
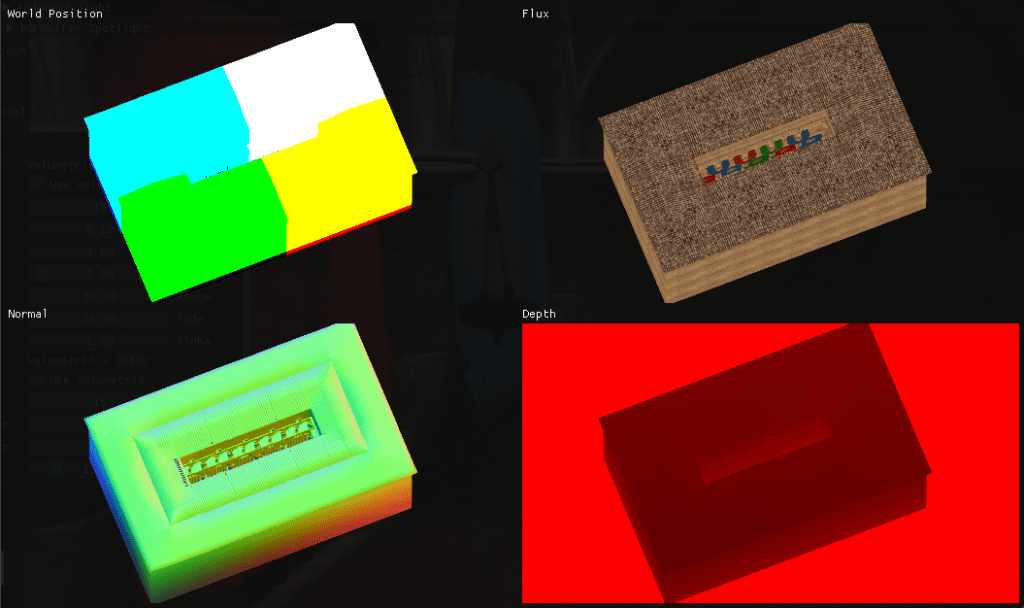
How do we use it?
The evaluation of the indirect light happens in a pixel shader. We do that by using the data stored in the reflective shadow map. For every pixel p, where x and n is the surface point and normal, the world space position xp, the normal np and the flux Φp we can evaluate the indirect light like so:

To do that, we need our graphics engine to utilise deferred rendering, because for each pixel we need some information from the G-buffer: the pixel’s colour, world position and normal. After our reflective shadow map pass and G-buffer pass, we can start evaluating the indirect light.
The G-buffer (not showing depth) that is used:
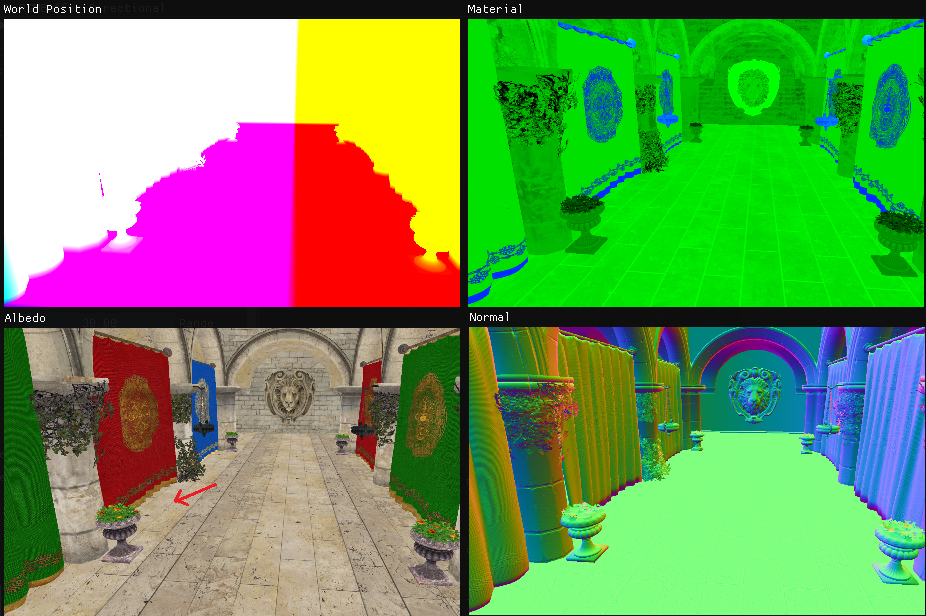
So let’s say we evaluate a pixel on the floor underneath the left red curtain, where the red arrow is pointing. For this pixel we take samples around it from the reflective shadow map. We do this by projecting the world position of the pixel into the reflective shadow map. The world position x and the normal n comes from this G-buffer view.
Then the position xp, normal xn and flux Φp is sampled from the reflective shadow map that is from the light’s perspective, as many times as we choose to, in a pattern that suits or needs. The evaluated indirect lighting at the pixel the red arrow is pointing at will be accumulated from all those samples.
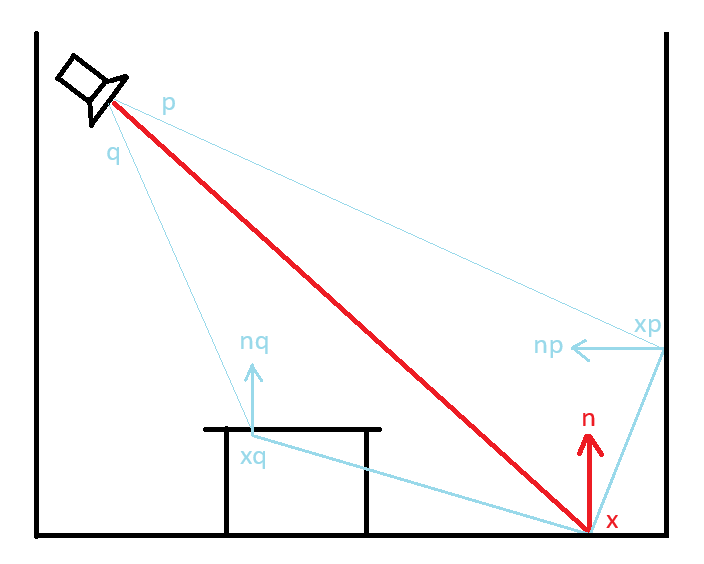
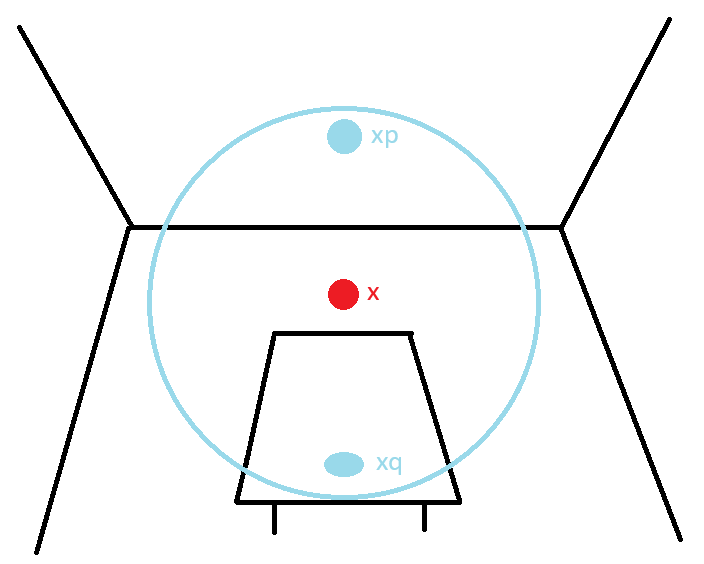
So to demonstrate this further. In the figure below, x is the world position for the pixel we are currently evaluating, and n is the normal. Here we take two samples from the reflective shadow map at nearby pixels p and q. The point x on the floor receives light from p but not from q, since the dot product in the first max function max(0, dot(np, x - xp)) will be negative resulting in it returning 0.
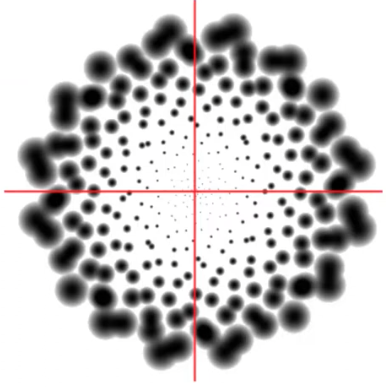
The more samples we take per pixel, the more our graphics card starts to suffer. To get a relatively good result we need to take at least a couple of hundred samples per pixel. Let’s say we take 400 samples per pixel at a resolution of 1920 by 1080. That’s 829 440 000 samples per texture, and we have three textures (world position, normal and flux), so that’s a total of 2 488 320 000 samples per light. Horribly inefficient!
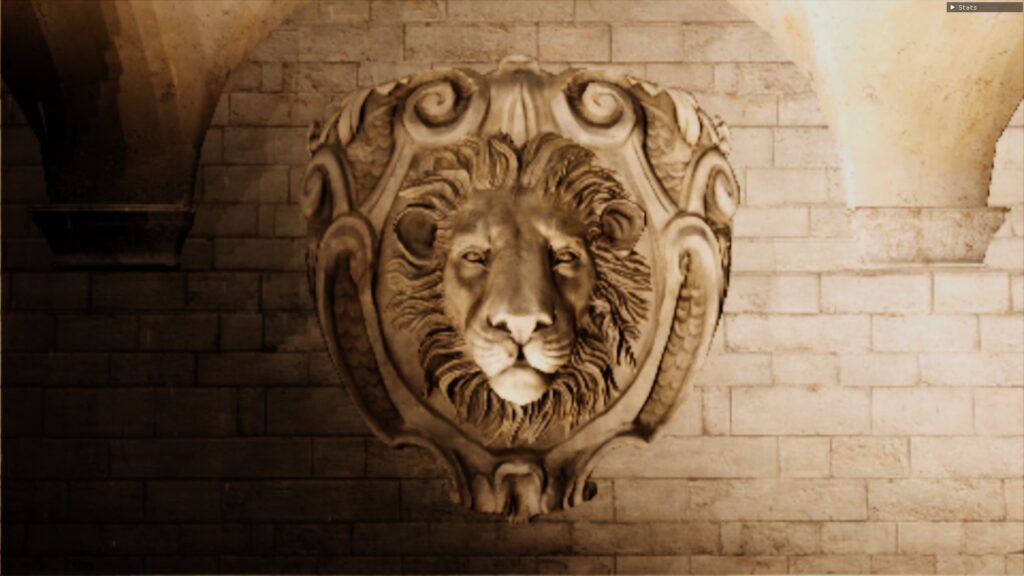
The paper has a solution for this: We take the samples from a lower resolution and then scale it back up. It’s way more efficient, but the result isn’t very pretty. Here, the indirect lighting is sampled at a low resolution and then upscaled which results in a poor quality image.
Screen-Space Interpolation
In order to improve the image quality, the authors of the paper solve this with screen-space interpolation. That means we check for each pixel whether the indirect light can be interpolated from the four surrounding low resolution samples. Those samples are regarded as suitable for interpolation if the sample’s normal is similar to the pixel’s normal and if its world space position is close to the pixel’s position.
Basically, if we would look at the very edge of our monitor, and then move our gaze an imaginary pixel further out so that we’re looking outside and past the screen, chances are we are looking at a wall or a plant or a person. The world positions and normals of those two points probably differ quite significantly. The resulting pixel from interpolation would be a mix of your monitor and the wall (or plant or person), which would result in weird artefacts. If they are not suitable for interpolation, we leave these pixels for the last pass where we sample the pixel at full resolution.
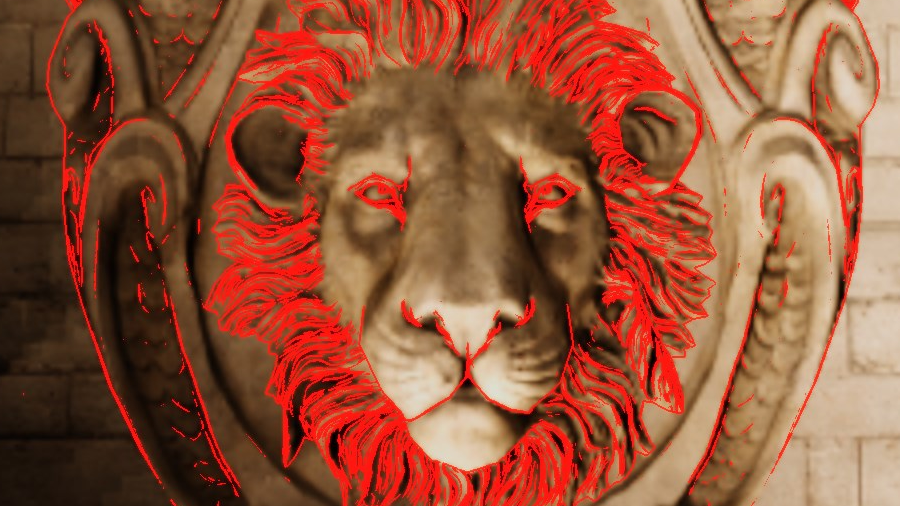
Here those pixels not suitable for interpolation are marked with red:
Here is a comparison between an image without screen-space interpolation on the left, and with screen-space interpolation on the right:
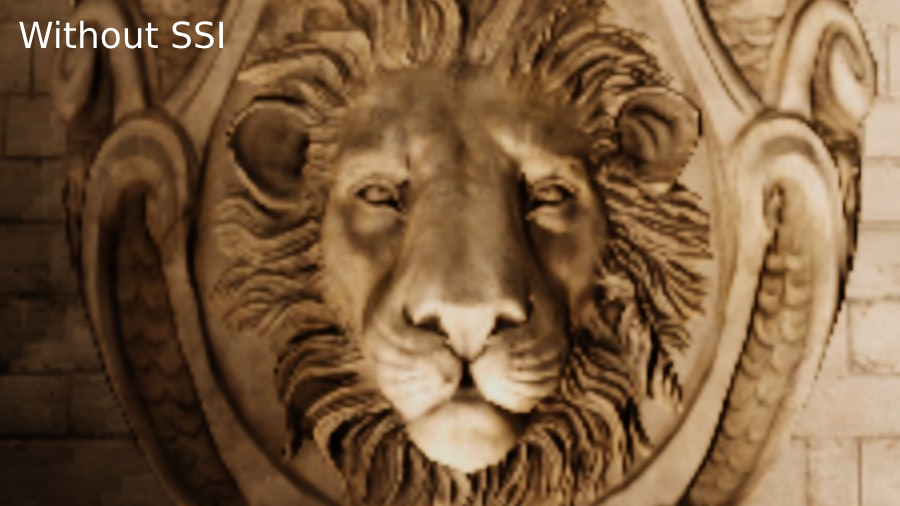
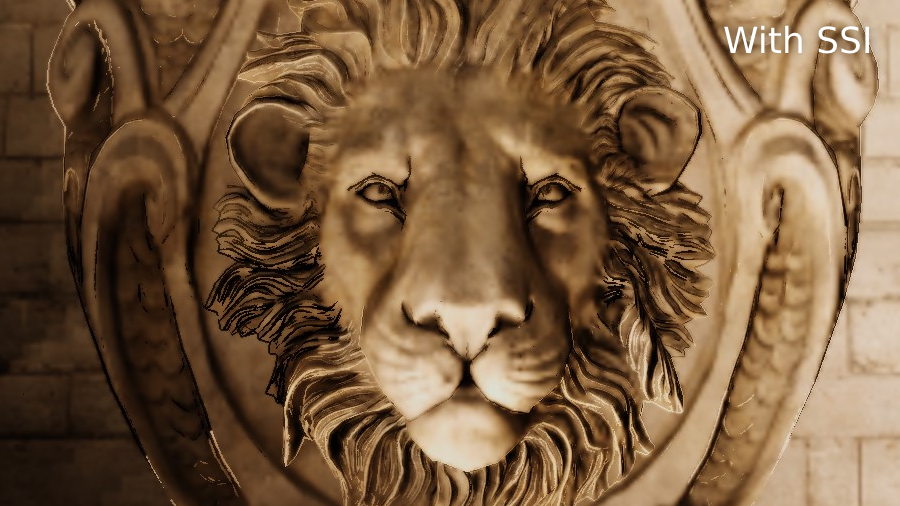
To sum up: In the screenshot above 600 samples were taken at a low resolution and screen-space interpolation was performed to evaluate which pixels to sample from full resolution. Rendering only Sponza on a NVIDIA GeForce RTX 2070 SUPER with 600 samples eats up a lot of performance, and the result is not at all that perfect to be honest. The low resolution artefacts are very visible and there is no variety in the sampling, because if more variety is introduced that would create noise.
Noise
At this point I had finished the implementation of the paper. The result was fine, but I was not over the moon about it. I decided to ask for some feedback from my teacher, who explained that in modern games it’s a common technique to take a low number of samples at full resolution, which results in a lot of noise, and then use various techniques to denoise the image. So I decided to try that.
First of all, we need to introduce some noise when we take a sample. I did this by adding a simple hash function that takes in a float3 and outputs a float2:
float2 hash23(float3 p3)
{
    p3 = frac(p3 * float3(0.1031, 0.1030, 0.0973));
    p3 += dot(p3, p3.yzx + 33.33);
    return frac((p3.xx + p3.yz) * p3.zy);
}
The noise can be the same for every sample for this pixel, so it should be outside the for-loop. Then we add it to the offset, and manipulate the x-variable to have a softer cutoff rather than linear. The offset is added to the texture coordinate when we sample the reflective shadow map.
float3 output = { 0.0, 0.0, 0.0 };
float2 noise = hash23(float3(aPixel.x, aPixel.y, currentTime * 1000.0));

for (uint i = 0; i < aSampleCount; i++)
{
    float2 offset = Hammersley(i, aSampleCount);

    offset.xy += noise;
    offset.xy = fmod(offset.xy, 1.0);

    // Soft radius rather than hard cutoff
    offset.x = (offset.x * offset.x * offset.x * offset.x + 1.0) * offset.x;

    float r = offset.x * aRMax;
    float theta = offset.y * TWO_PI;
    float2 coord = aUv + float2(r * cos(theta), r * sin(theta));
    float weight = offset.x * offset.x;

    float3 xp = rsmWorldPositionTex.Sample(linearSampler, coord).xyz;
    float3 flux = rsmFluxTex.Sample(linearSampler, coord).rgb;
    float3 np = normalize(2.0 * rsmNormalTex.Sample(linearSampler, coord).xyz - 1.0);

    float3 Ep = flux * ((max(0, dot(np, aX - xp)) * max(0, dot(aN, xp - aX)))
									               / pow(length(aX - xp), 4));

    Ep *= weight;
    output += Ep;
}

return output / aSampleCount * aIntensity;
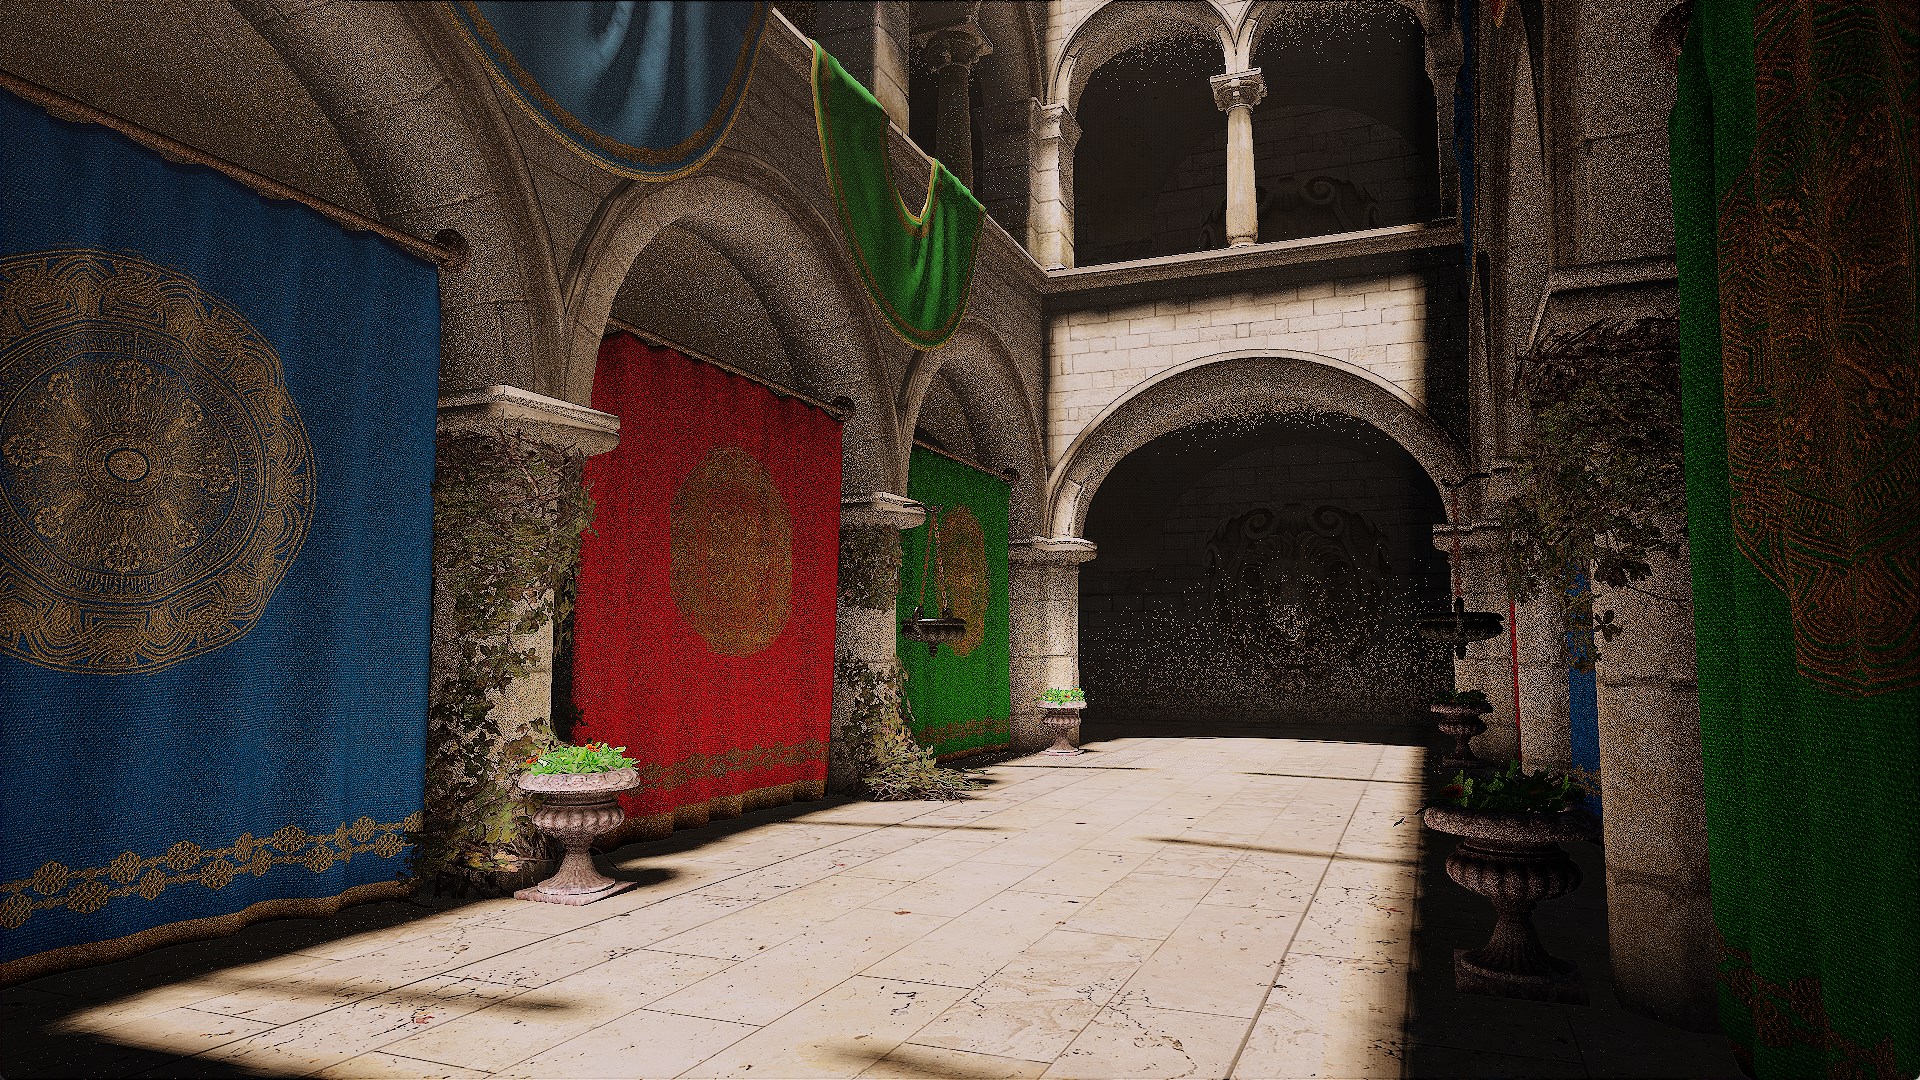
Using the current time as a parameter when generating the noise gives us different noise every frame, resulting in the crackling static of an old television tuned to a dead channel.
With 1 sample per pixel, it looks like this:
And with 12 samples per pixel we get this:
In order to denoise the image, there are a couple of different things we can do:
Spatial filtering, which reuses similar neighbouring pixels to alter parts of the image. This won’t cause any temporal lag or ghosting but introduces bluriness and muddiness.
Temporal accumulation, which reuses data from the previous frame to smooth out the image in the current frame. It introduces temporal lag but doesn’t produce any blurriness.
Machine learning and deep learning reconstruction, which uses a neural network to reconstruct the image.
I chose to implement a technique called temporal anti-aliasing which not only smoothens jagged edges but it also reduces noise, and is relatively simple to implement which fits within the scope of this project.
Temporal Anti-Aliasing
What is temporal anti-aliasing? Well, as the temporal part of the name suggests it has to do with time. What it boils down to is that we combine information from the current frame with past frames, using jitter to make sure the frames differ a little.
Jitter
The first thing we do is apply a random offset to the translation of the projection matrix each frame, following a quasi-random sequence. Most implementations I found use a Halton sequence so this is what I went for. This produces the jitter we’re looking for.
Resolve
The next step is the resolve pass. This means that we use an accumulation buffer for the previous frames, so that we can read from N while writing to N-1 one frame, and then read from N-1 while writing to N the next, and then the cycle repeats.
Each frame we blend the current frame with the accumulated frame like so:
float3 currentColour = currentTexture.Sample(linearSampler, aInput.texCoord).rgb;
float3 previousColour = previousTexture.Sample(linearSampler, aInput.texCoord).rgb;

float3 output = currentColour * 0.1 + previousColour * 0.9;
This blends the frames well together, but as soon as we move the camera we get a lot of ghosting.
The reason we get ghosting is because the previous frame is sampled at the same position as the current frame, but the camera has moved a little since then, so we need to account for that difference somehow.
Reprojection
The next step is called reprojection, and that means we take the current world position at a pixel and reproject it using the view-projection matrix of the previous frame.
float2 CameraReproject(float3 aPosition)
{
    float4 screenPosition = mul(historyViewProjection, float4(aPosition, 1.0));
    float2 screenUV = screenPosition.xy / screenPosition.w;
    float2 reprojectedUV = screenUV * float2(0.5, -0.5) + 0.5;
    return reprojectedUV;
}

float4 main(const PixelInput aInput) : SV_TARGET
{
    float3 worldPosition = worldPositionTexture.Sample(linearSampler, aInput.texCoord).rgb;

    float2 reprojectedUV = CameraReproject(worldPosition);

    float3 currentColour = currentTexture.Sample(linearSampler, aInput.texCoord).rgb;
    float3 previousColour = previousTexture.Sample(linearSampler, reprojectedUV).rgb;

    float3 output = currentColour * 0.1 + previousColour * 0.9;

    return float4(output, 1.0);
}
That fixes most of the ghosting but not all. Parts of the image that weren’t previously visible still cause ghosting.
Colour clamping
The solution to this is colour clamping. This means that when we sample a pixel, the colours in its neighbourhood can make valid contributions to the accumulation process. If we find that the values differ greatly we can adjust them to fit in the neighbourhood.
float3 currentColour = currentTexture.Sample(linearSampler, aInput.texCoord).rgb;
float3 previousColour = previousTexture.Sample(linearSampler, reprojectedUV).rgb;

float3 minColour = 9999.0, maxColour = -9999.0;

for (int x = -1; x <= 1; ++x)
{
    for (int y = -1; y <= 1; ++y)
    {
        float3 colour = currentTexture.Sample(linearSampler, aInput.texCoord + float2(x, y) / resolution);
        minColour = min(minColour, colour);
        maxColour = max(maxColour, colour);
    }
}

float3 previousColourClamped = clamp(previousColour, minColour, maxColour);

float3 output = currentColour * 0.1 + previousColourClamped * 0.9;
This does not remove the ghosting entirely, but it significantly reduces it.
The result
There are ways to further improve temporal anti-aliasing but these techniques are beyond the scope of this project. If I had more time I would definitely delve deeper into the world of temporal anti-aliasing to reduce ghosting and improve the visual fidelity of the end result. I would also spend some more time researching and implementing a denoising technique. This is something I’m excited to do in future projects!
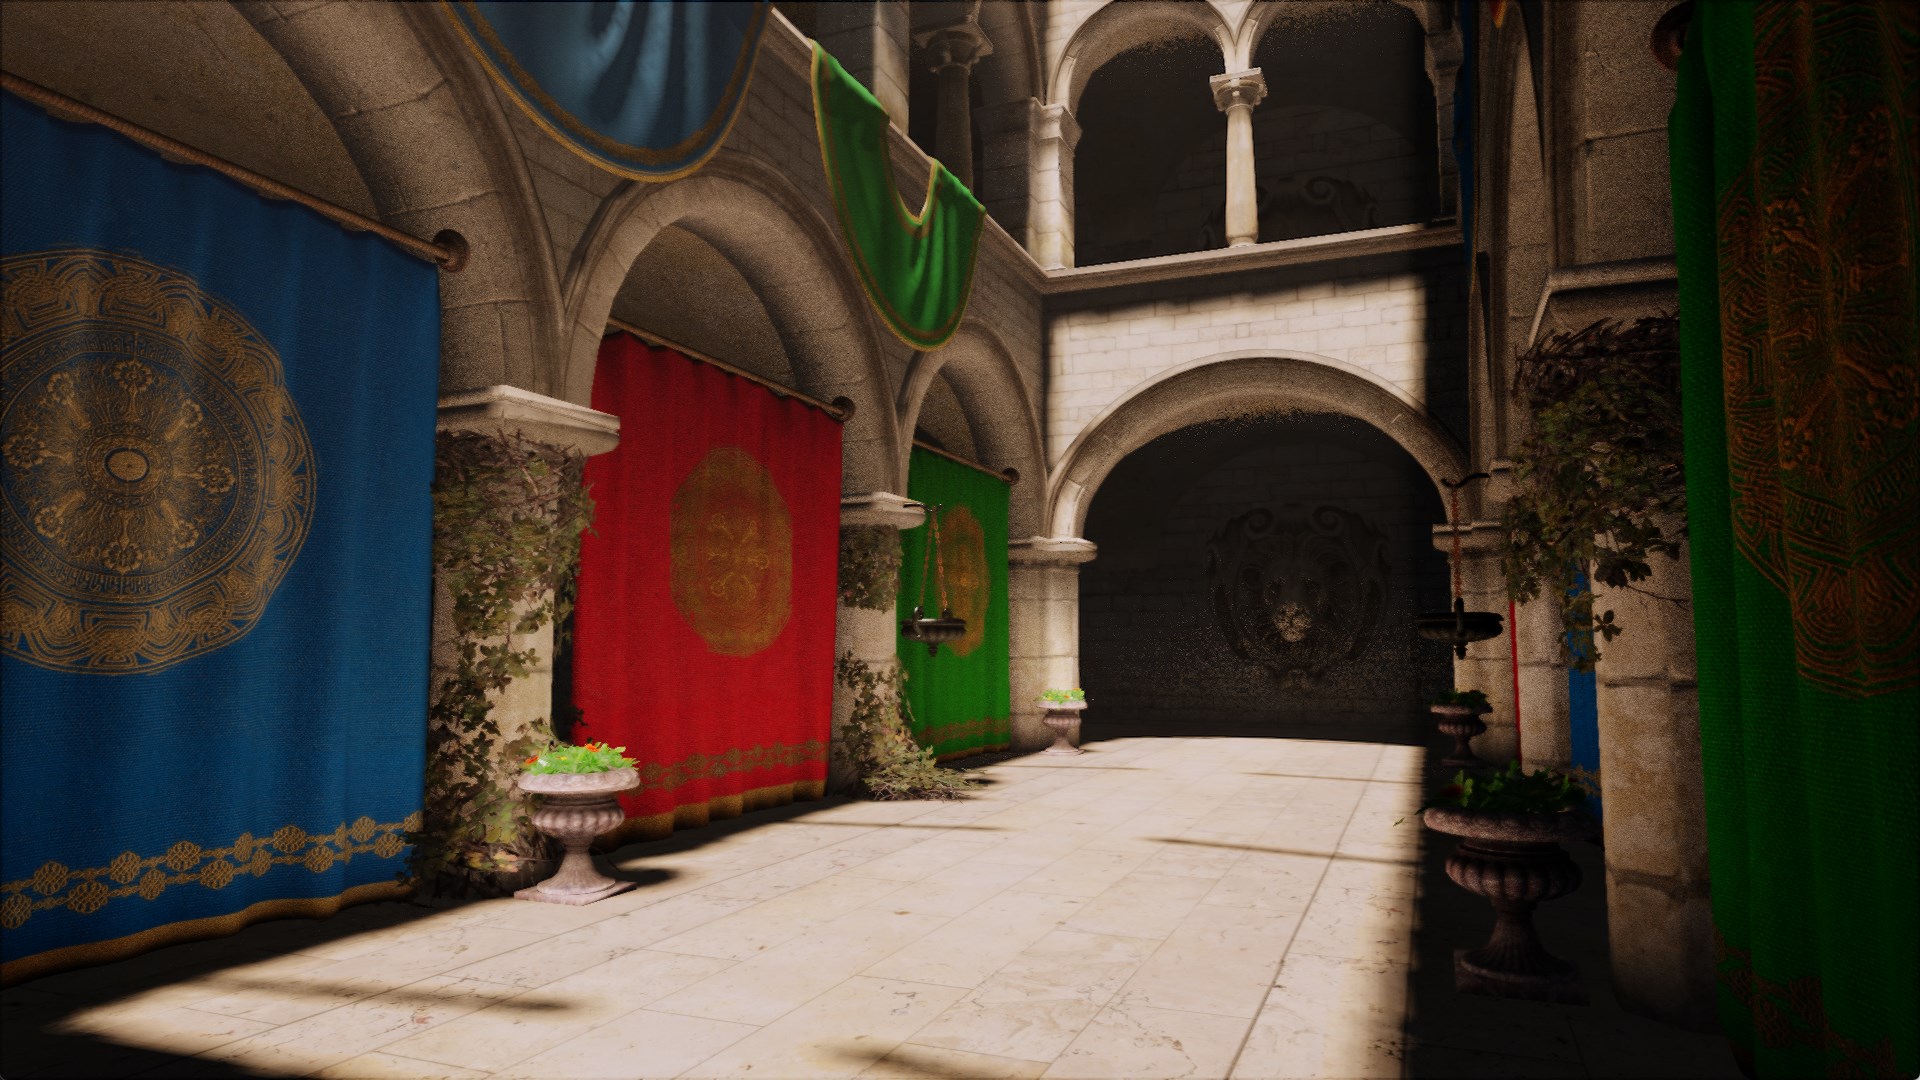
To demonstrate the amount of denoising temporal anti-aliasing manages to do I chose to render the indirect lighting with 12 samples with temporal anti-aliasing on and off.
Volumetric Light
Introduction
I wanted to add some volume to the light to really make it stand out together with the indirect light, so I read a little bit about volumetric light and the concept is quite simple. Since I already do a fullscreen lighting pass with information from the G-buffer, all I have to do is add the volumetric light contribution when calculating my light.
Implementation
Volumetric light is evaluated by ray marching between the camera position and the world position of the current pixel. For each step we use the information from the shadow map to check if the position can be seen by the light or not, and accumulate the light scattered in the camera direction using the Henyey-Greenstein phase function.
A dither pattern softens the edges a bit. With 15 steps it looks good and barely takes any performance. It could be made to look even better by blurring but I didn’t feel that it was necessary.
float4x4 DITHER_PATTERN = float4x4
    (float4(0.0, 0.5, 0.125, 0.625),
     float4(0.75, 0.22, 0.875, 0.375),
     float4(0.1875, 0.6875, 0.0625, 0.5625),
     float4(0.9375, 0.4375, 0.8125, 0.3125));

float CalculateScattering(float aCosTheta, float aScattering)
{
    return (1.0 - aScattering * aScattering) /
    (4.0 * PI * pow(1.0 + aScattering * aScattering - 2.0 * aScattering * aCosTheta, 1.5));
}

float3 Volumetric(float3 aWorldPosition, float3 aCameraPosition, uint aSteps, float2 aUv, float2 aResolution, matrix aTransform, Texture2D aShadowMap, SamplerState aSampler, float3 aLightDirection, float3 aColour, float aScattering)
{
    float3 volumetric = float3(0.0, 0.0, 0.0);
    float3 direction = aWorldPosition - aCameraPosition;

    float stepSize = length(direction) / (float)aSteps;
    direction = normalize(direction);
    float3 step = direction * stepSize;

    float3 position = aCameraPosition;
    position += step * DITHER_PATTERN[int(aUv.x * aResolution.x) % 4][int(aUv.y * aResolution.y) % 4];

    for (int i = 0; i < aSteps; i++)
    {
        float4 lightSpacePositionTemp = mul(aTransform, float4(position, 1.0));
        float3 lightSpacePosition = lightSpacePositionTemp.xyz / lightSpacePositionTemp.w;

        float2 sampleUV = 0.5 + float2(0.5, -0.5) * lightSpacePosition.xy;

        float shadowMapValue = aShadowMap.Sample(aSampler, sampleUV).r;

        if (shadowMapValue > lightSpacePosition.z)
        {
            volumetric += CalculateScattering(dot(V, -aLightDirection), aScattering) * aColour;
        }
        position += step;
    }
    volumetric /= (float) aSteps;

    return volumetric;
}
The result
At times the dithering pattern can be a bit too visible, in which case a blurring pass would do the trick. But I found that for the most part the volumetric light looked amazing anyway. If I had more time I would definitely polish it further.
Final result
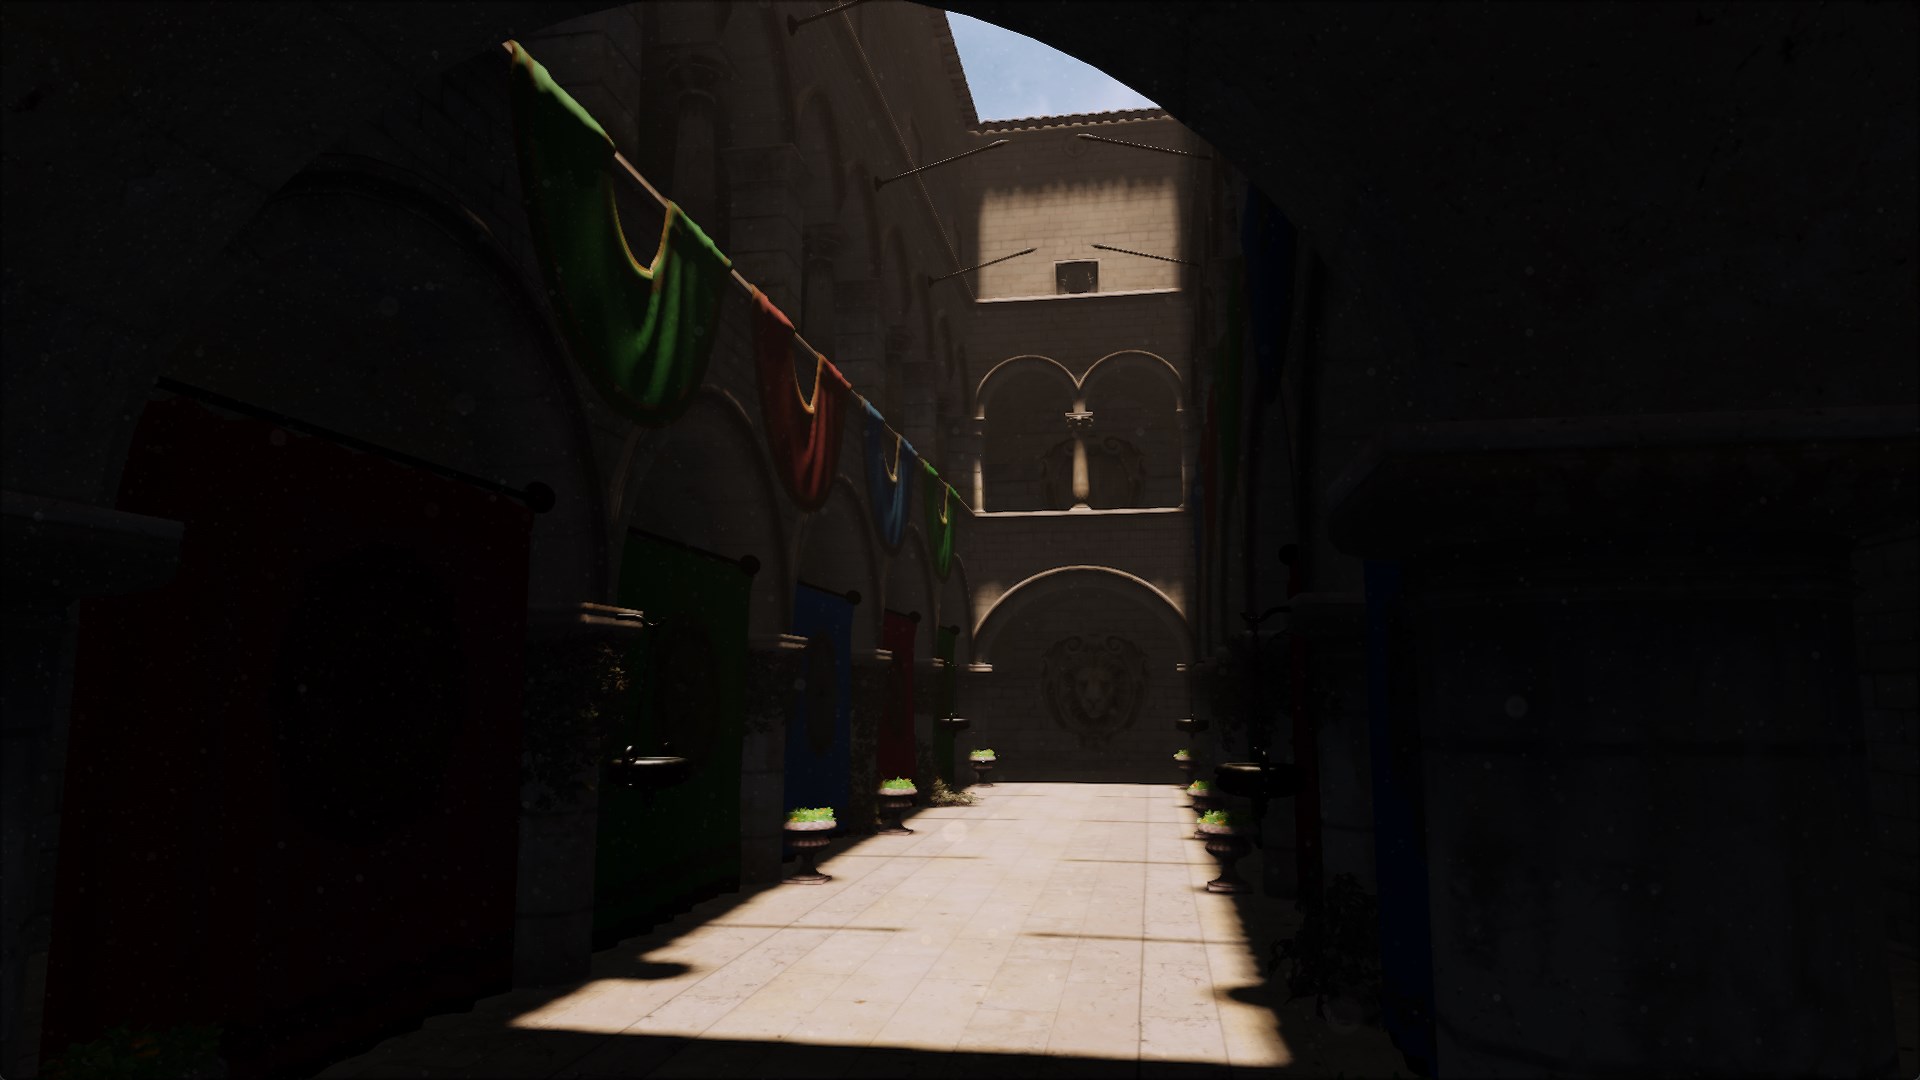
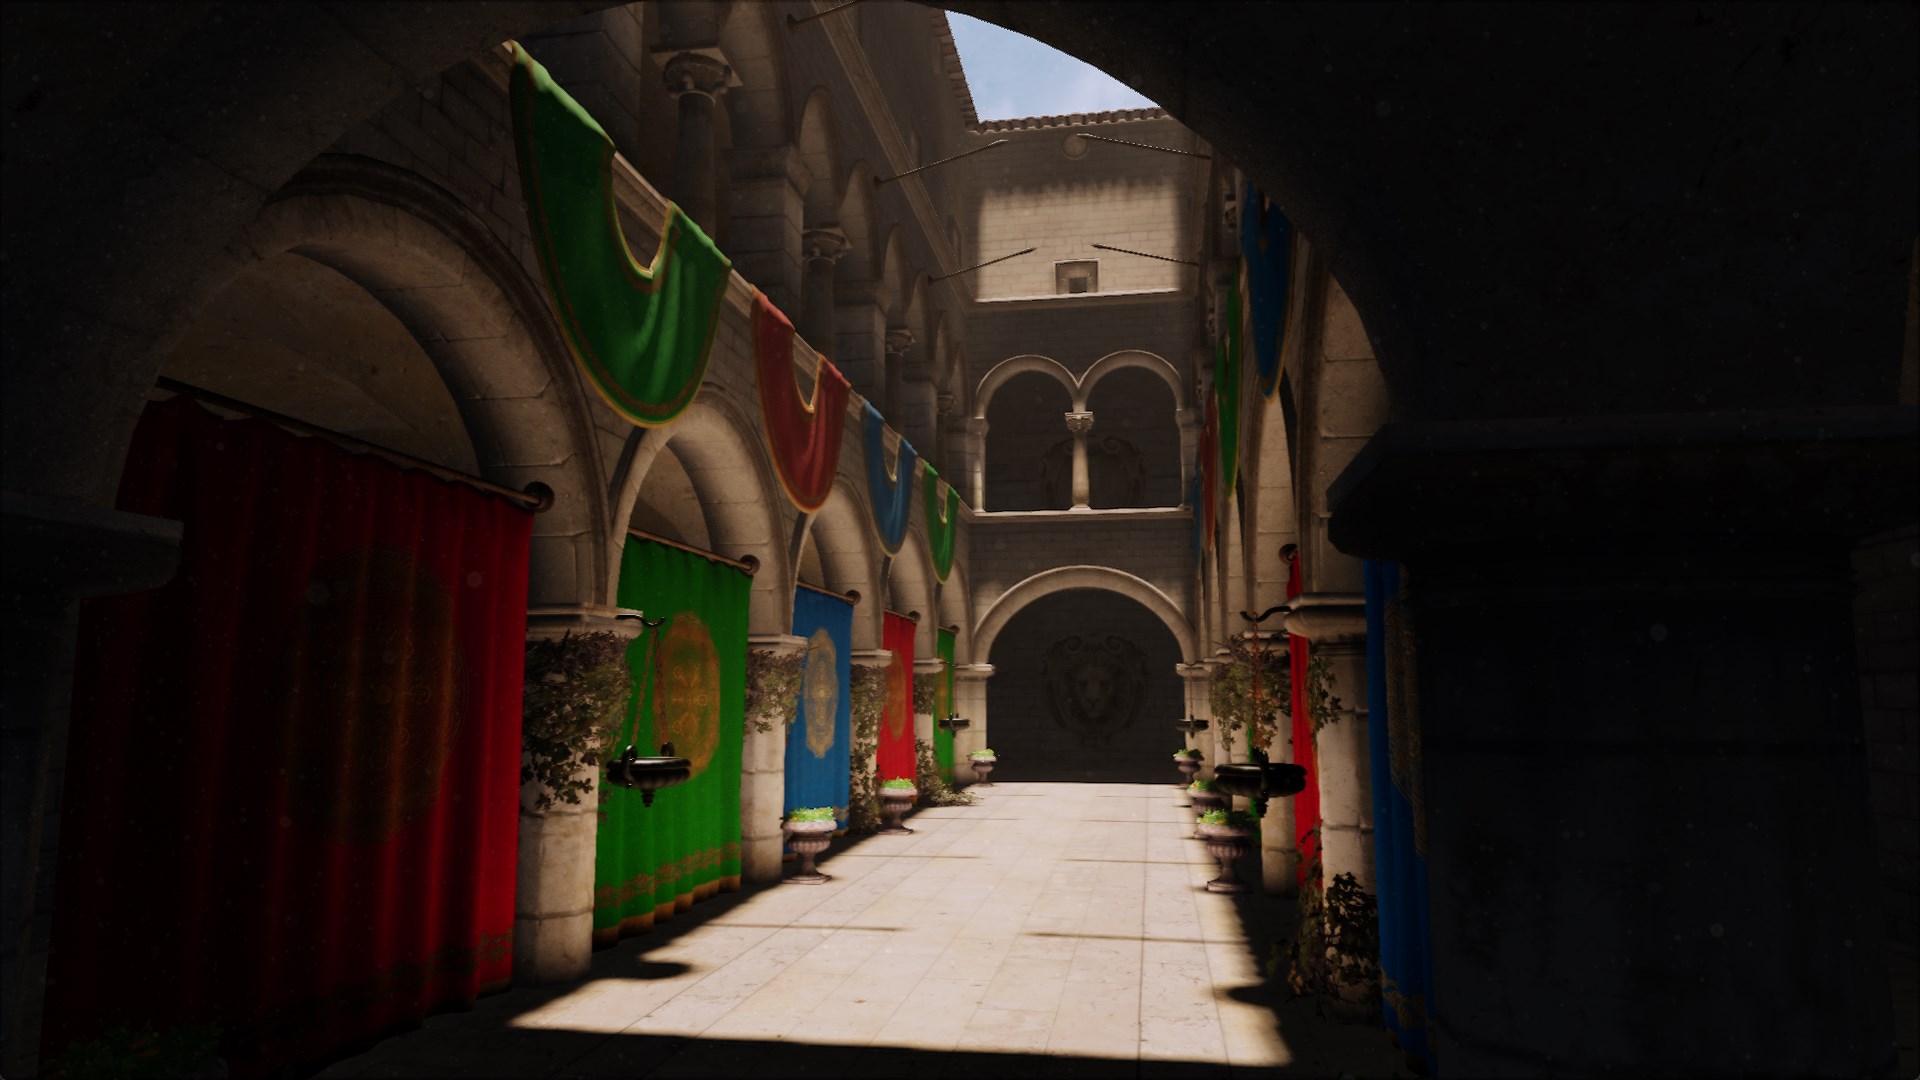
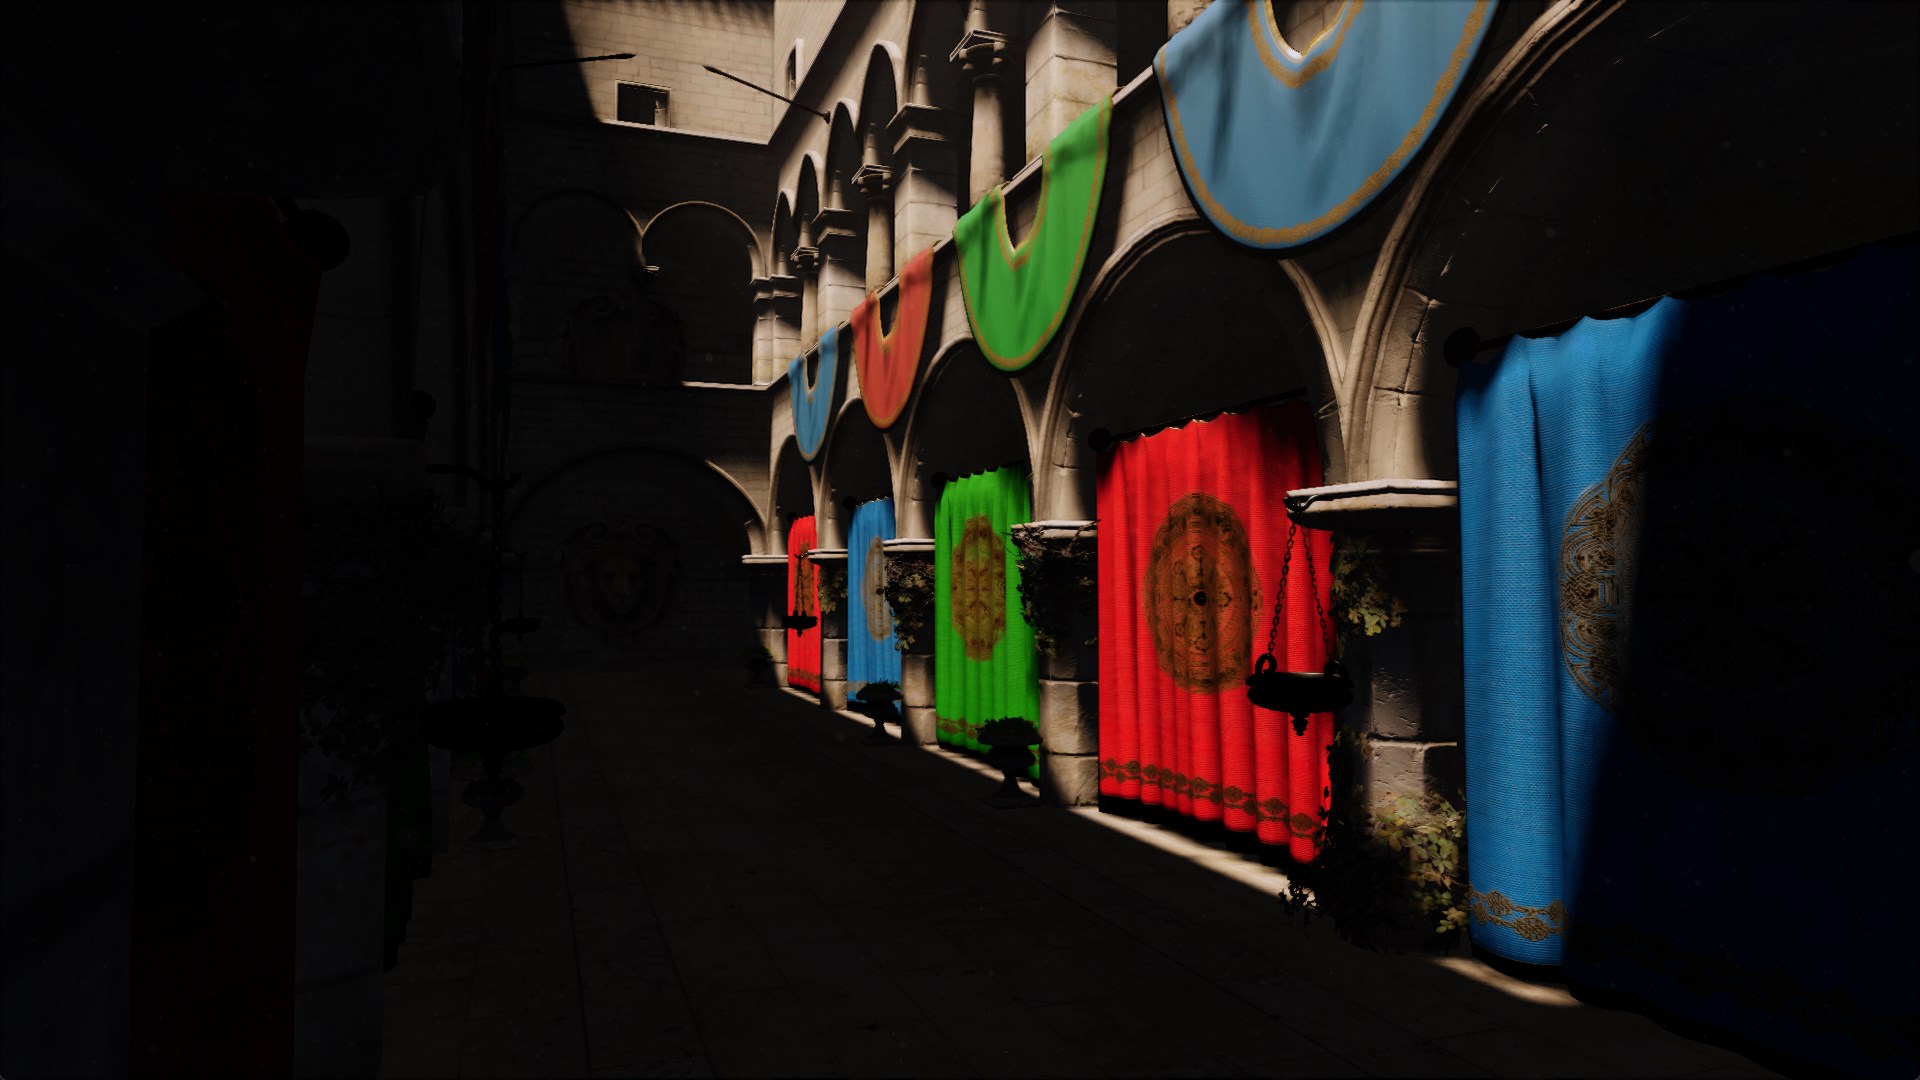
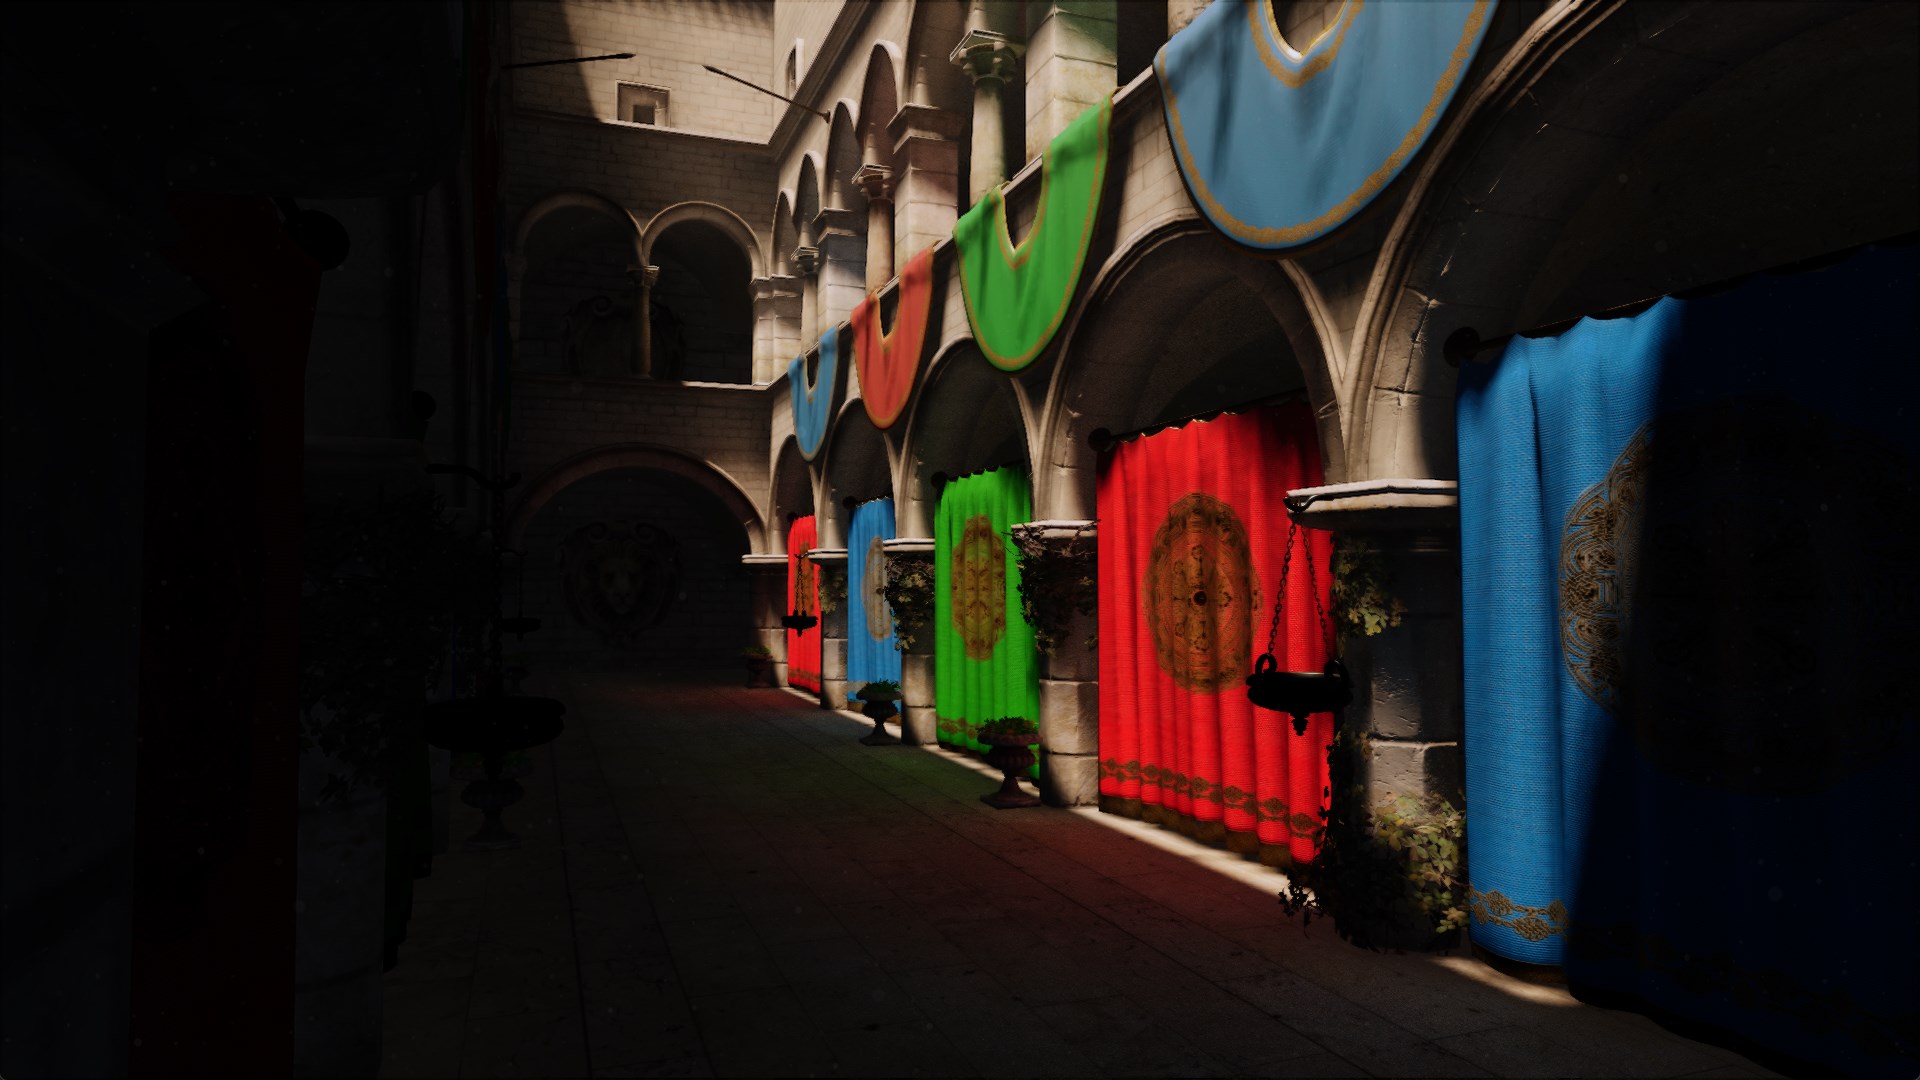
Post Mortem
Before I started this project I looked at a myriad of global illumination techniques and my eye kept being drawn to the most advanced ones. I’m glad I finally decided to base my project around reflective shadow maps. The technique is relatively simple to implement and is a great introduction to indirect lighting. I found that there were some challenges to overcome, like figuring out the implementation pipeline and understanding the math, but I would recommend anyone who’s curious about indirect lighting to try their hands at reflective shadow maps.
Strengths
- Dynamic lighting
- Low sample count results in high performance
- Modern denoising techniques can make it look great
- Relatively simple to understand and implement
Weaknesses
- Only one bounce
- Cache-inefficient sampling
- Each light source requires its own reflective shadow map
Future work
It has been a great experience and proved to be a perfect first step into the world of indirect lighting. My goal now is to implement the technique in our next and final game project with better denoising to keep the high performance with high fidelity. I also look forward to exploring more modern techniques on my own time, such as ray-tracing and screen-space global illumination.
There are also some improvements I could make to my current code. For example, I don’t need a world position buffer in the G-buffer since I can calculate it from the depth buffer.
